Kubernetes 1.6.1 Authentication via Google
My notes how to use Google Accounts with Kubernetes cluster with Role Based Access-Control (RBAC) authorization mode.
I have self-hosted Kubernetes setup via kubeadm on AWS. How to setup the Kubernetes cluster 1.6.0-beta I described in the article. Today I use Kubernetes 1.6.1. API server listens only secure port and by default the authorization done via client certificate.
Thanks to Micah Hausle’s article Reduce administrative toil with Kubernetes 1.3 and based on it I created a step list before setup a new cluster:
Step 1: Creating a Google API Console project and client ID
- Go to https://console.developers.google.com/projectselector/apis/library
- From the project drop-down, select an existing project, or create a new one by selecting Create a new project
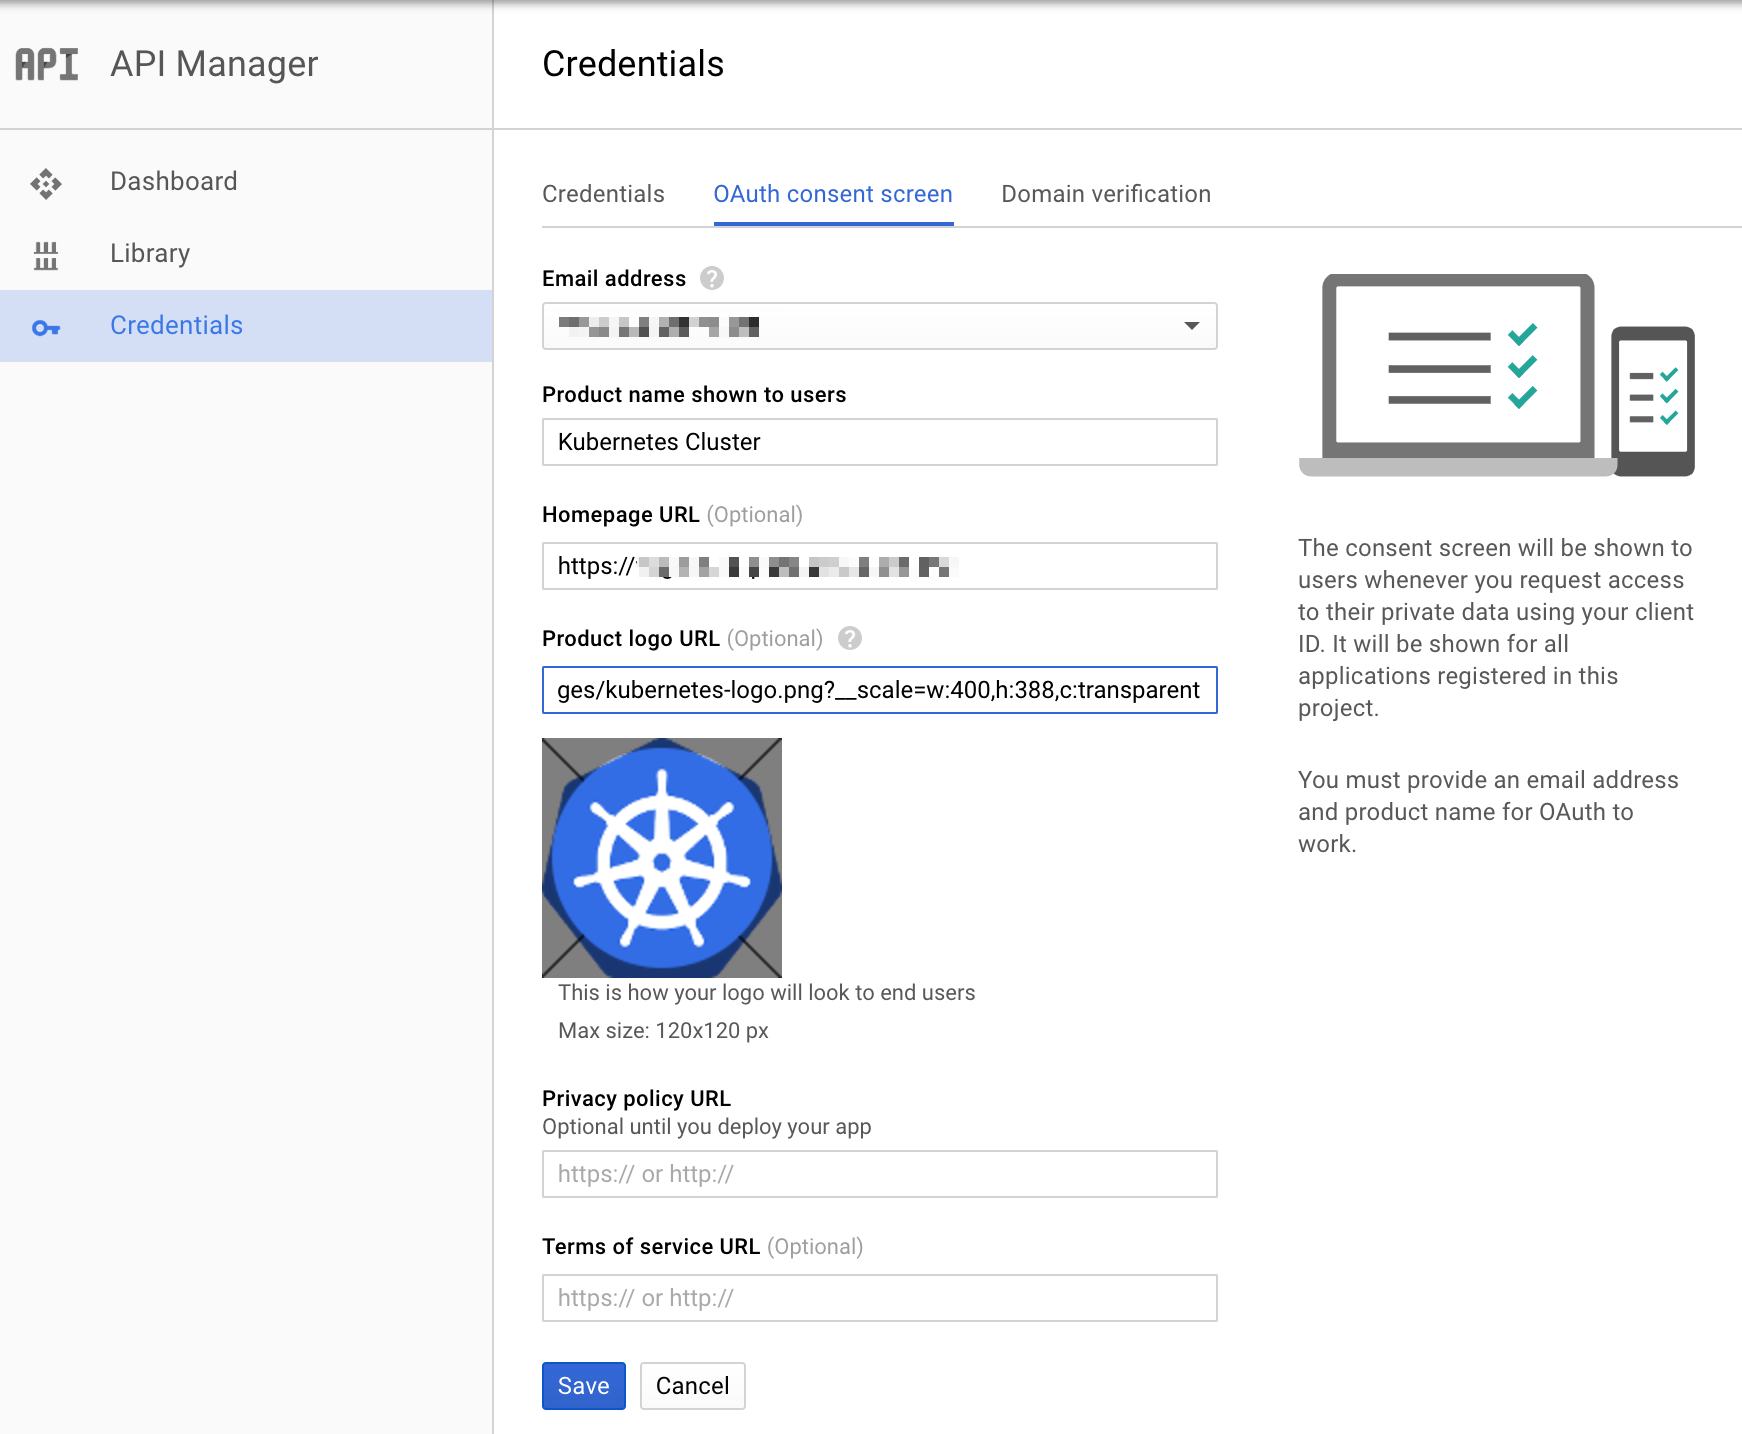
- In the sidebar under “API Manager”, select Credentials, then select the OAuth consent screen tab.

- Choose an Email Address, specify a Product Name, and press Save.

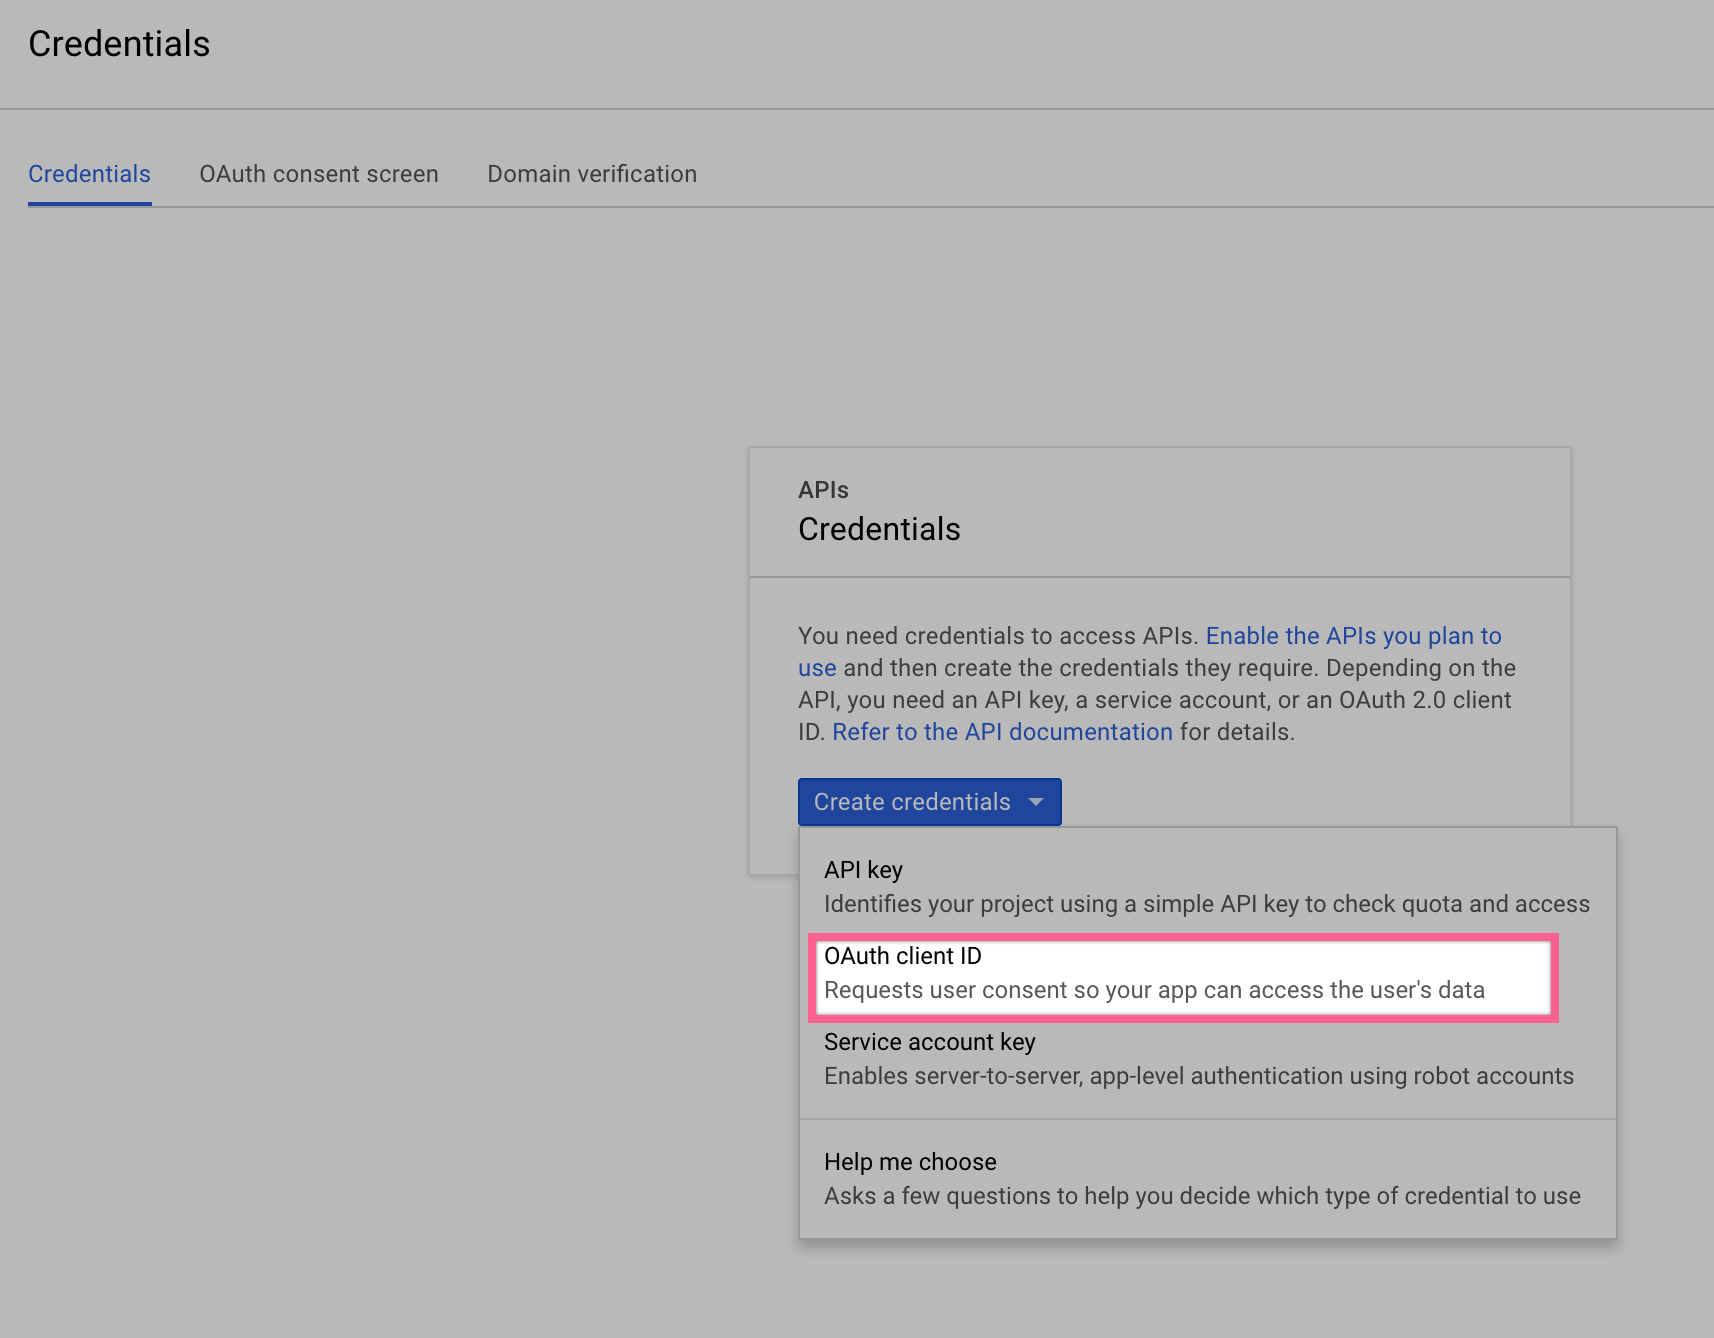
- In the Credentials tab, select the New credentials drop-down list, and choose OAuth client ID.

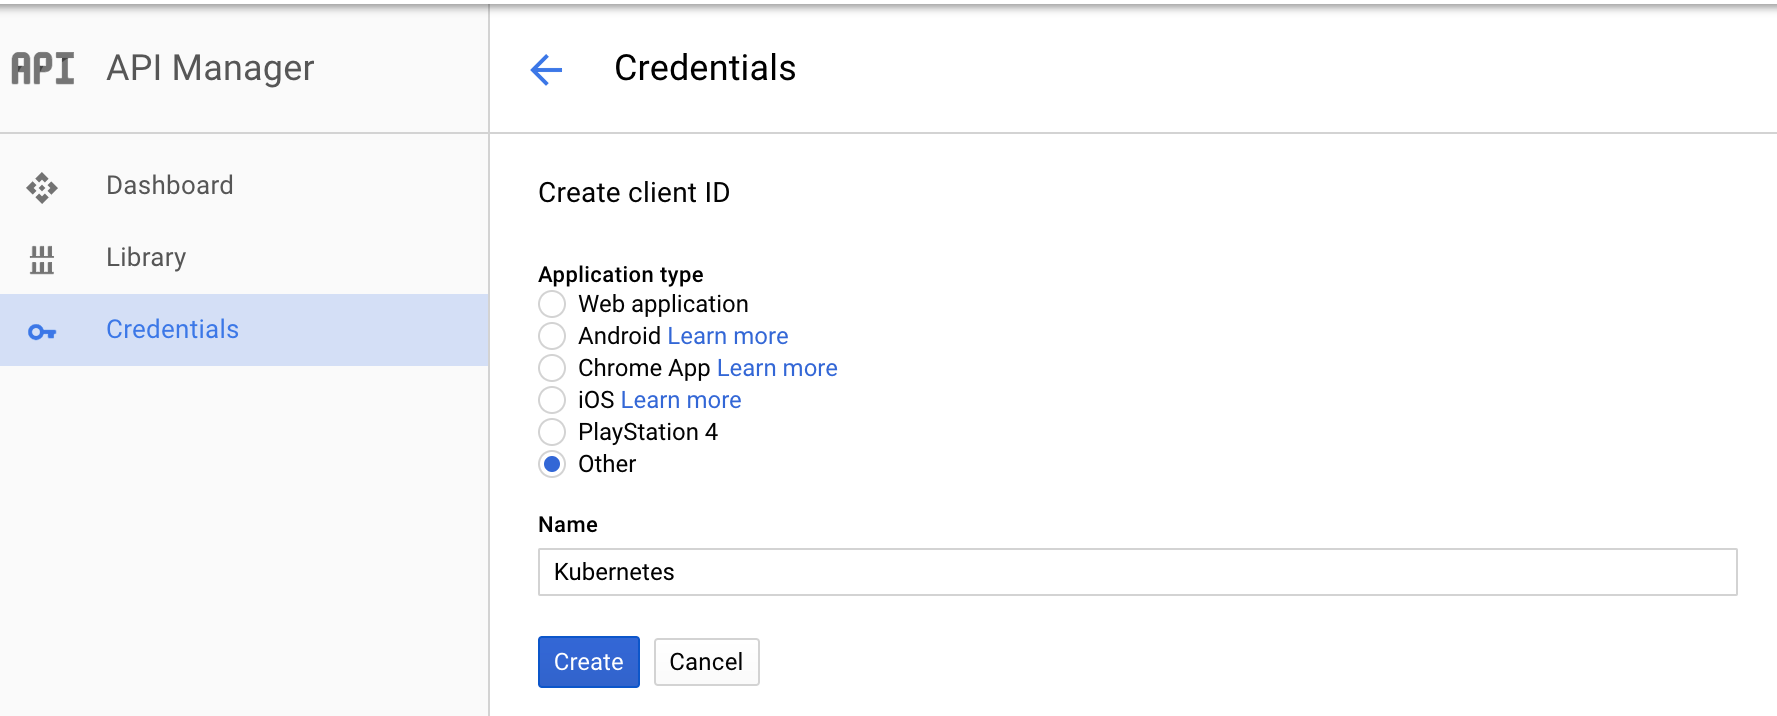
- Under Application type, select Other.

- From the resulting OAuth client dialog box, copy the Client ID. The Client ID lets your app access enabled Google APIs.
- Download the client secret JSON file of the credentials.
Step 2: Setup a Kubernetes cluster
After we initialized the master instance, need to update the kube api server arguments in the /etc/kubernetes/manifests/kube-apiserver.yaml. Each argument should be on a separate line. More details about OIDC attributes here.
$ sed -i "/- kube-apiserver/a\ - --oidc-issuer-url=https://accounts.google.com\n - --oidc-username-claim=email\n - --oidc-client-id=<Your Google Client ID>" /etc/kubernetes/manifests/kube-apiserver.yaml
Add any network CNI plugin and the cluster is ready. Copy /etc/kubernetes/admin.conf to local ~/.kube/config and change the cluster ip.
$ kubectl get nodes
NAME                         STATUS    AGE       VERSION
ip-10-9-11-30.ec2.internal   Ready     15m       v1.6.1
Step 3: Generate local user credentials
3.1 Install the k8s helper on the client machine:
$ go get github.com/micahhausler/k8s-oidc-helper
3.2 Generate a user’s credentials for kube config:
$ k8s-oidc-helper -c path/to/client_secret_<client_id>.json
Would open the browser and ask permissions. After that, it provides you a token in the browser. Copy it and paste to the terminal for k8s-oidc-helper. The output of the command should look like:
# Add the following to your ~/.kube/config
users:
- name: name@example.com
  user:
    auth-provider:
      config:
        client-id: 32934980234312-9ske1sskq89423480922scag3hutrv7.apps.googleusercontent.com
        client-secret: ZdyKxYW-tCzuRWwB3l665cLY
        id-token: eyJhbGciOiJSUzI19fvTKfPraZ7yzn.....HeLnf26MjA
        idp-issuer-url: https://accounts.google.com
        refresh-token: 1/8mxeZ5_AE-jkYklrMAf5IMXnB_DsBY5up4WbYNF2PrY
      name: oidc
Copy everything after users and append to you existing user list in the ~/.kube/config. Now we have 2 users. One from the new cluster configuration and one we added.
3.3 Verify token
Test the id-token using https://jwt.io/. Be sure that you have “email_verified”: true in the decoded message. Test connection of the new user:
$ kubectl --user=name@example.com get nodes
Error from server (Forbidden): User "name@example.com" cannot list nodes at the cluster scope. (get nodes)
It proves that id-token and api server arguments work and email is extracted from a request.
Step 4: Grant permissions
For now, we grant Admin rights to the user name@example.com. We created an authorization specification:
kind: ClusterRole
apiVersion: rbac.authorization.k8s.io/v1alpha1
metadata:
  name: admin-role
rules:
  - apiGroups: ["*"]
    resources: ["*"]
    verbs: ["*"]
---
kind: ClusterRoleBinding
apiVersion: rbac.authorization.k8s.io/v1alpha1
metadata:
  name: admin-binding
subjects:
  - kind: User
    name: name@example.com
roleRef:
  kind: ClusterRole
  name: admin-role
After applying changes via kubectl apply -f admin.yaml — validate=false. Do the test again:
$ kubectl --user=name@example.com get nodes
NAME                         STATUS    AGE       VERSION
ip-10-9-11-30.ec2.internal   Ready     20m       v1.6.1
OIDC authorization only works for kubectl. I could not find easy way to use it with Kubernetes UI or any other services inside a cluster.
Next steps for you: add a new user and grant permissions per group.

Michael Nikitochkin is a Lead Software Engineer. Follow him on LinkedIn or GitHub.
If you enjoyed this story, we recommend reading our latest tech stories and trending tech stories.